Endpoint Privilege Manager Part 2: Creating Policies & Rules
Step-by-step guide to creating and configuring Endpoint Privilege Manager policies.
Endpoint Privilege Manager Part 2: Creating Policies & Rules
Now that Endpoint Privilege Manager is enabled (from Part 1), it’s time to create policies that actually control admin access. This is where the magic happens—where you define who can get admin rights, when, and for how long.
Let’s dive in.
Understanding EPM Policy Types
Before creating anything, understand the two main policy types:
1. Just-In-Time (JIT) Access
- User requests admin elevation when needed
- Access is temporary (minutes to hours)
- Optional: require approval from a manager or IT admin
- Full audit trail of every request
Best for: Users who occasionally need admin rights (installing printers, running specific apps)
2. Scheduled Rotation
- Local admin password rotates on a schedule you define
- Users get admin rights automatically without requesting
- No approval required
- Harder to audit who used what when
Best for: Scenarios where you need local admin for automation or specific workflows but want password rotation for security
Recommendation: Start with Just-In-Time for most users. It’s more secure and gives you better visibility.
Creating Your First EPM Policy
Step 1: Navigate to Policy Creation
- Sign in to Microsoft Endpoint Manager (https://endpoint.microsoft.com)
- Go to Devices → Endpoint Privilege Management → Policies
- Click Create policy
Screenshot: 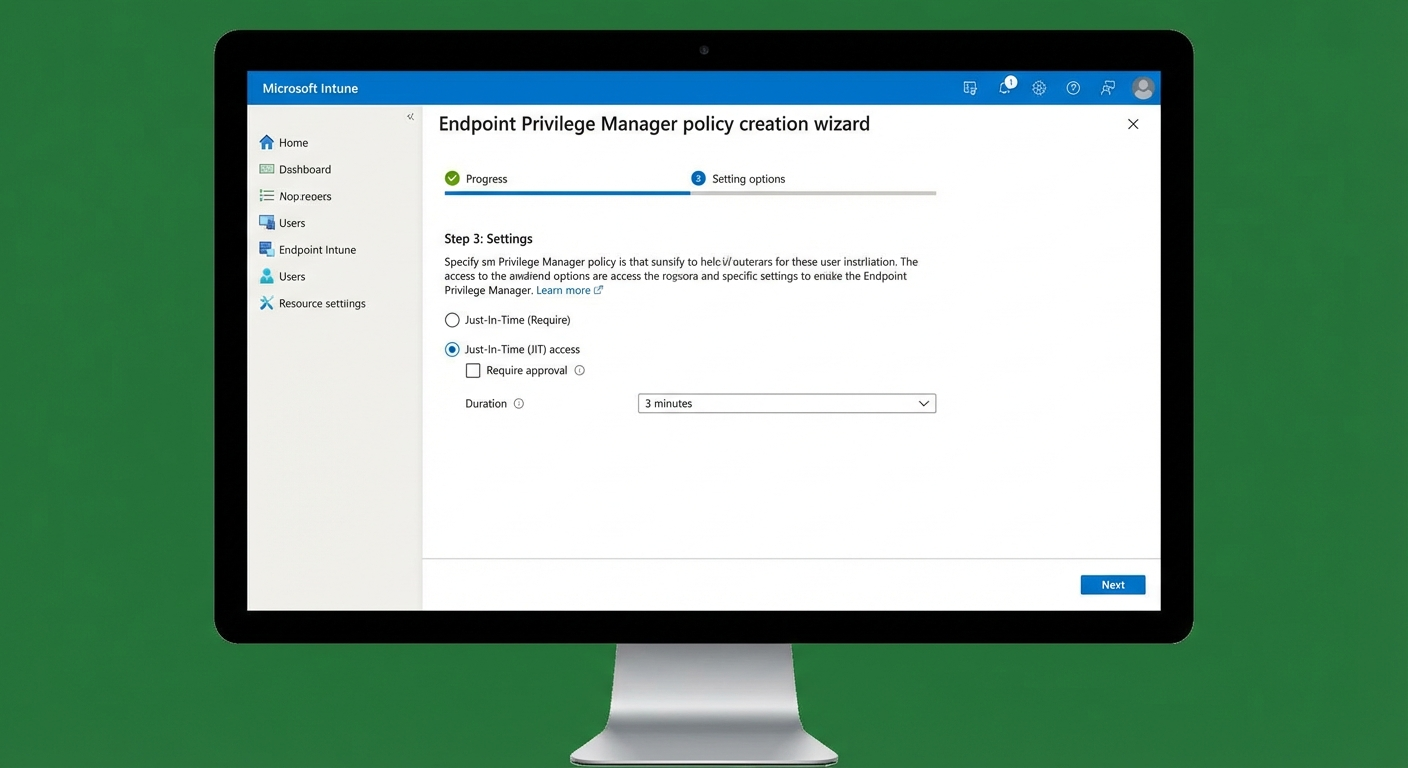
Step 2: Basic Configuration
-
Name: Give it a descriptive name
- Example:
IT Users - JIT Admin Access
- Example:
-
Description: Explain what this policy does
- Example: “Provides Just-In-Time admin elevation for IT department”
-
Policy type: Select Just-In-Time access or Scheduled
-
Platform: Ensure Windows is selected
Step 3: Configure Elevation Rules
This is the core of your policy. Here’s what you can configure:
Screenshot: 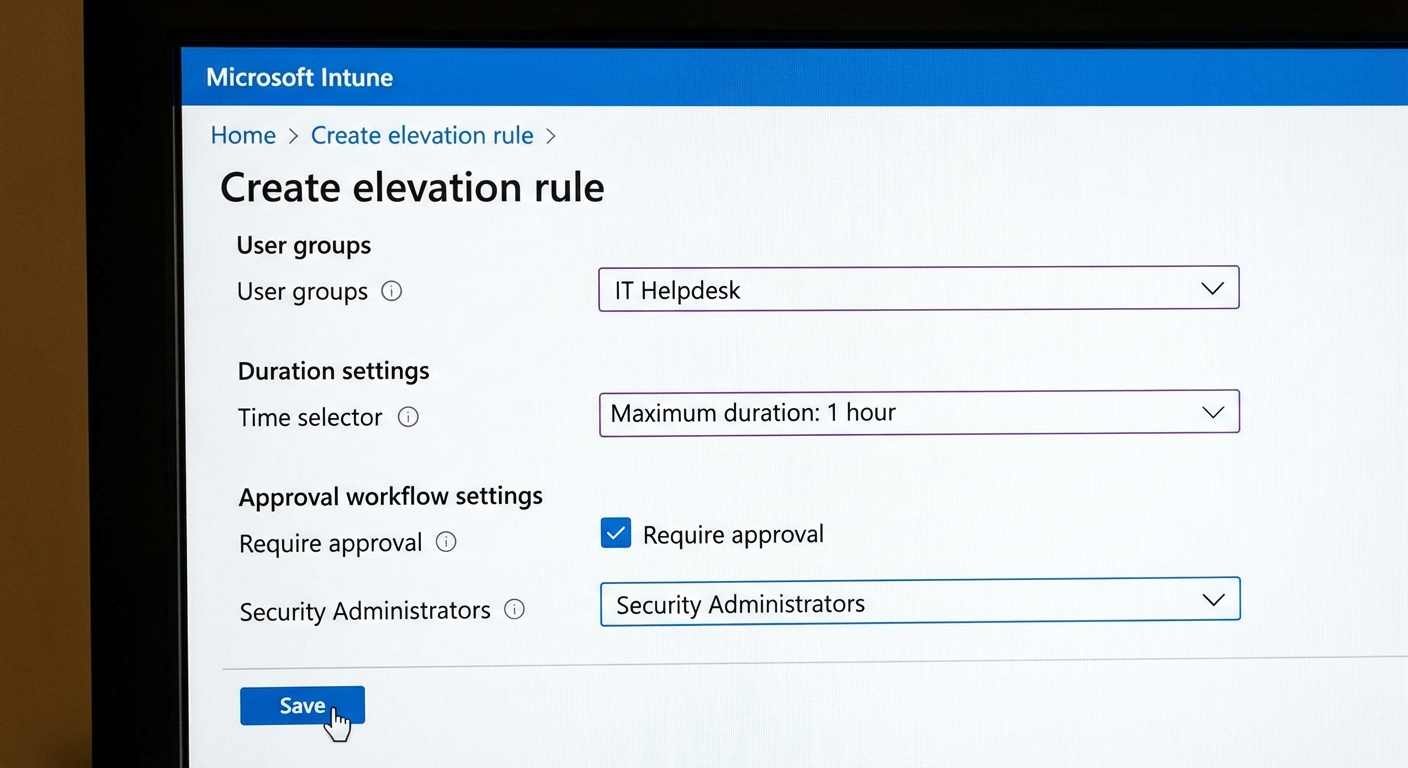
Who Can Request Elevation?
# Options include:
# - Specific security groups (recommended)
# - All users
# - Exclude specific groups
Best practice: Create a security group called “EPM-Requesters” and add users who need admin access.
How Long Does Access Last?
- Duration: 15 minutes to 8 hours (default: 1 hour)
- Grace period: How long before the user must actually use the elevation
What Can They Elevate?
Configure which applications or commands can run with admin rights:
| Setting | Description |
|---|---|
| Applications | Specific apps from Microsoft Store or Win32 |
| Scripts | PowerShell, batch, or executable files |
| Commands | Specific CLI commands |
Approval Requirements
- No approval required – User gets access immediately
- Approver required – Request goes to designated approvers
- Multiple approvers – Requires multiple people to approve
Screenshot: 
If requiring approval:
- Specify approvers (users or groups)
- Set approval timeout (how long the request is valid)
- Configure approver notifications
Step 4: Assign to Devices/Users
Now target who gets this policy:
Screenshot: 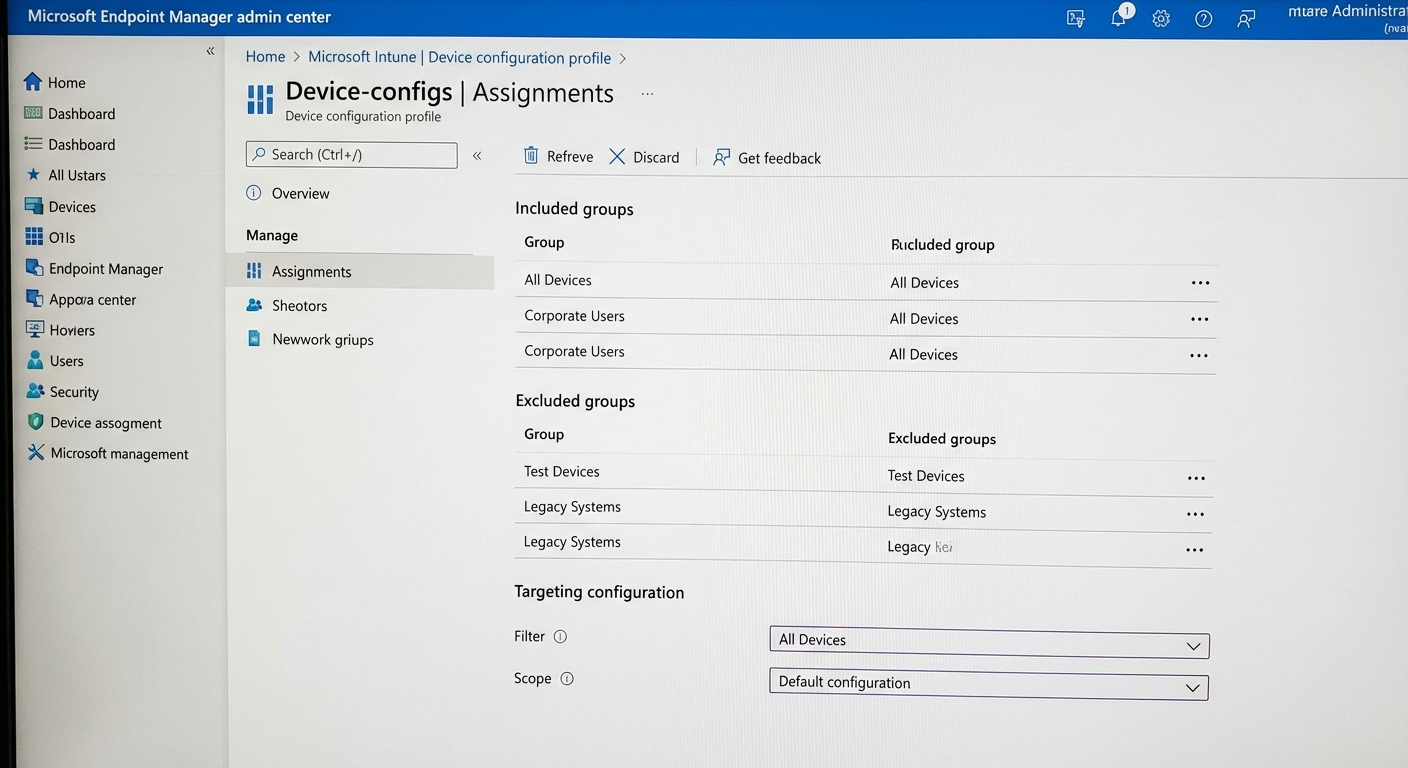
- Assignments → Create groups
- Included groups: Select who gets this policy
- Excluded groups: Select who should never get this policy
Example assignment:
| Group Type | Group | Purpose |
|---|---|---|
| Included | EPM-Pilot-Users | Pilot group for testing |
| Excluded | EPM-Excluded-Devices | Devices that shouldn’t have EPM |
Important: Start with a small pilot group. Monitor for a week before rolling out broadly.
Step 5: Review and Create
- Review all settings
- Click Create to save the policy
- The policy will deploy to targeted devices within ~15 minutes
Configuring Elevation Rules: Deep Dive
Let’s look at the key settings more closely.
Application Control Rules
You can restrict what users can do when elevated:
# Example configuration:
# - Allow: All Microsoft Store apps
# - Allow: Specific approved utilities (e.g., c:\tools\adminutil.exe)
# - Block: cmd.exe, PowerShell.exe (unless approved)
Conditional Rules
Set rules based on:
- Device compliance status – Only elevate on compliant devices
- Network location – Require approval when off corporate network
- Time of day – Stricter rules during business hours vs. off hours
Credential Caching
EPM caches credentials for a short period after elevation:
- Session-based: Credentials valid for that session only
- Time-based: Credentials valid for the configured duration
Approval Workflow (If Enabled)
When a user requests admin access:
1. User Request
User clicks Run as administrator on a protected app, or:
- Goes to Company Portal
- Requests elevation for specific app
2. Approval Request
- Approver receives email notification
- Approver reviews request in Endpoint Manager
3. Approval Decision
- Approved: User gets temporary admin rights
- Rejected: User gets notification, no access granted
4. Usage & Audit
- Every elevation is logged
- User can now perform admin tasks
- After duration expires, elevation ends
Creating Scheduled Rotation Policies
If you prefer scheduled rotation instead of JIT:
Key Differences
| Setting | Just-In-Time | Scheduled |
|---|---|---|
| Trigger | User request | Time-based |
| Duration | Minutes to hours | Hours to days |
| Approval | Optional | Not available |
| Use case | On-demand elevation | Controlled automation |
Configuration
- Password rotation frequency: Daily, weekly, or monthly
- Password complexity: Auto-generated, follows your complexity requirements
- Notification: Who gets notified when password rotates
- Recovery: How to recover password if needed
Warning: Scheduled rotation can cause issues if applications depend on the local admin account. Test thoroughly before deploying.
Best Practices for Policy Creation
- Start small – Pilot with IT staff first
- Use groups – Assign policies to groups, not individual users
- Require approval – At least initially, until you understand usage patterns
- Document exceptions – Know which apps users actually need admin for
- Monitor closely – Check activity logs daily during first month
- Iterate – Adjust duration and rules based on real usage
What’s Next?
Your policies are now in place. In Part 3, we’ll cover:
- Monitoring activity and reviewing logs
- Generating usage reports
- Troubleshooting common issues
- Advanced tips for production environments
Let’s make sure your EPM deployment is actually working.
Series: Endpoint Privilege Manager
- Part 1: Introduction & Setup
- Part 2: Creating Policies & Rules (You are here)
- Part 3: Management & Troubleshooting